Collections
A collection is a group of assets that is curated for quick access. Like assets, collections can be assigned metadata via a metadata template.
Collections can be Private or Shared:
-
Private collections are only accessible by the collection creator. There are no security templates assigned to them. If you assign a security template to a collection, it is considered a Shared collection.
-
Shared collections are accessible by other users. You can share a collection with specific groups by assigning security templates, or with specific internal users via user id or email.
When viewing shared collections, users can only see the assets they are permitted to view, as permitted by the asset’s assigned security templates.
Collections page:

Create a collection
You can create collections from the Content gallery, an asset's detail page, the Cart, the Collections page, and the Upload Assets page.
-
To create a collection from the Content gallery or an asset's detail page, you select assets and add them to a new collection using the ⋮ menu. See Create a collection from the Content gallery and Create a collection from an asset's detail page.
-
To create a collection from the Cart, you select assets and add them to a new collection. See Create a collection from the Cart.
-
From the Collections page, you can create an empty collection and then add assets to it later. You can continue adding assets to collections regardless of the method used to create it. See Create an empty collection from the Collections page.
-
In the Upload Assets page, you can create a new collection by entering the name in the Add to Collection field. See Create a collection from the Upload Assets page.
Create a collection from the Content gallery
In the Content gallery, you can create a new collection from a single asset or from a bulk selection of assets. Both flows use the ⋮ menu and open the same collection creation panel. Use the Share this collection? toggle in the panel to set the collection as Private or Shared.
To create a collection from a single asset in the Content gallery:
-
In the Content gallery, hover over the asset card and click the ⋮ menu.
-
Hover over Add to Collection and select New Collection. The Add to New Collection panel opens.
-
Configure the Share this collection? toggle:
- Off — the collection is private and visible only to you.
- On — the collection is shared. You must assign one or more Security Templates to control who can see and interact with it.
-
Fill out the necessary collection metadata. Required fields are marked with an asterisk (*).
- Use the Show Required Only toggle at the bottom of the panel to display only required fields.
-
Click Save. The collection is created and the asset is automatically added to it.
Note: The collection preview will automatically be set to the asset you selected.
To create a collection from a bulk selection in the Content gallery:
-
In the Content gallery, select multiple assets by clicking their checkboxes. A bulk action bar appears at the top of the gallery.
-
Click the ⋮ menu in the bulk action bar, hover over Add to Collection, and select New Collection. The Add to New Collection panel opens.
-
Configure the Share this collection? toggle and fill out the necessary collection metadata, following Steps 3–4 above.
-
Click Save. The collection is created and all selected assets are automatically added to it.
Note: The collection preview will automatically be set to the most recently uploaded image asset in the selected set of assets.
Create a collection from an asset's detail page
You can create a new collection directly from an asset's detail page. The asset is added to the new collection in the same action.
To create a collection from an asset's detail page:
-
Open the asset's detail page and click the ⋮ menu in the top-right corner.
-
Hover over Add to Collection and select New Collection. The Add to New Collection panel opens.
-
Configure the Share this collection? toggle:
- Off — the collection is private and visible only to you.
- On — the collection is shared. You must assign one or more Security Templates to control who can see and interact with it.
-
Fill out the necessary collection metadata. Required fields are marked with an asterisk (*).
- Use the Show Required Only toggle at the bottom of the panel to display only required fields.
-
Click Save. The collection is created and the asset is automatically added to it.
Create a collection from the Upload Assets page
When you add files to Tenovos, you can create a new collection as part of the upload process. In the Upload Assets page, you can choose to add the assets to an existing collection or enter the name of a new one. For details, see Upload assets to a collection.
Replace the collection preview
You can replace the thumbnail preview of your Private collections and the Shared collections that you have permission to modify. You can do this in two ways.
To replace a collection preview using a local file:
-
Display the Collections page and open the context menu for the collection.

-
Click Replace Preview. If you do not see this menu option, you do not have the required permissions for the collection.
-
On your computer, locate and select the replacement preview image.
-
At the Update Thumbnail confirmation prompt, click Update.
To replace a collection preview using an asset in your collection:
-
Display the Collections page and open your desired collection.
-
Navigate to the asset that you would like to use as the collection preview. Click Set as Collection Preview. If you do not see this menu option, you do not have the required permissions for the collection.

-
You will receive a confirmation message when the collection preview has been replaced.
Add a collection to the Home page
To add a collection the the home page, the collection must first be Featured. Featuring a collection means that it has been promoted for home page visibility. Featuring a collection can be performed by a user who has access to view the collection and whose role contains the 'Configurations Management' role privilege.
How to Feature a single Collection
-
Display the Collections page and open the context menu for the collection.
-
Click Feature Collection. If you do not see this menu option, you do not have the required permissions for the collection.

How to Feature multiple Collections
-
Display the Collections page.
-
Select the collections you would like to feature and click the Feature Collections button in the top right hand corner.

If the Feature Collections button is not active upon selecting multiple collections, you either do not have the required permissions for the one of the selected collections, or some of the selected collections are already featured.
Note: If all selected collections are already featured, the button will say 'Un-Feature Collections'.
How to Un-Feature a single Collection
-
Display the Collections page and open the context menu for the collection.
-
Click Un-Feature Collection. If you do not see this menu option, you do not have the required permissions for the collection. Collections can also be un-featured directly from the Configurations > Featured Collections page.
How to choose the order in which Featured Collections are show on the Home Page.
This topic is covered in Featured Collections documentation within Configuration Administration.
Change the Collection Type
After you create a collection, you cannot directly modify the Collection Type of Private or Shared. You can, however, add the collection assets to the Cart and then create a new collection–either Private or Shared.
Edit collection settings
You can modify the Metadata Template, Collection Name, and collection metadata for a Private collection and the Shared collections that you have permission to modify. For Shared collections, you can also change the Security Template selections.
To edit collection settings:
-
Display the Collections page.
-
Open the context menu for the collection you want to modify and click Edit Metadata. The collection’s settings dialog opens.
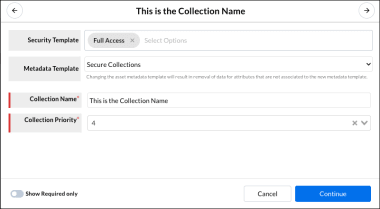
- Make the required changes then click Continue to apply your edits.
Add Tenovos assets to an existing collection
You can add assets to your private collections and to the shared collections that you are permitted to modify. A single collection has a limit of 5000 assets that can be added to the collection.
You can add assets to an existing collection from three entry points: an asset’s detail page, the asset card in the content gallery, or a bulk selection in the gallery. All three entry points open the same Add to Existing Collection panel.
Only collections that do not already contain the selected asset are shown in the panel. This flow is additive only — you cannot remove assets from a collection using this panel.
To add a single asset to an existing collection from the asset’s detail page:
-
Open the asset’s detail page and click the ⋮ menu in the top-right corner.
-
Hover over Add to Collection and select Existing Collections. The Add to Existing Collection panel opens.
-
Use the search bar to find the collection(s) you want to add the asset to.
-
Check the checkbox next to one or more collections. You can add the asset to multiple collections in a single action.
-
Click Save. A success notification confirms the asset was added.
To add a single asset to an existing collection from the Content gallery:
-
In the Content gallery, hover over the asset card and click the ⋮ menu.
-
Hover over Add to Collection and select Existing Collections. The Add to Existing Collection panel opens.
-
Use the search bar to find the collection(s) you want to add the asset to.
-
Check the checkbox next to one or more collections.
-
Click Save. A success notification confirms the asset was added.
To add multiple assets to an existing collection from the Content gallery:
-
In the Content gallery, select multiple assets by clicking their checkboxes. A bulk action bar appears at the top of the gallery.
-
Click the ⋮ menu in the bulk action bar, hover over Add to Collection, and select Existing Collections. The Add to Existing Collection panel opens.
-
Use the search bar to find the collection(s) you want to add the assets to.
-
Check the checkbox next to one or more collections.
-
Click Save.
The platform will process all selected assets. Assets not already in the selected collection(s) are added; assets that already exist are skipped automatically. The success notification reflects both outcomes — for example: "3 assets were successfully added. 5 assets already existed in the selected collection."
Upload assets to a collection
When you add files to Tenovos, you can create a new collection as part of the upload process. In the Upload Assets page, you can choose to add the assets to an existing collection or create a new one.
-
To add the assets to an existing collection, click the Add to Collection field in the Upload Assets page and select a collection from the dropdown list.
-
To create a new collection, type the new name in the Add to Collection field. If the collection does not already exist, Tenovos automatically identifies your entry as a New Collection. See the following Step 5 for details about creating a new collection via the Upload Assets page.
To upload assets to a collection:
- In the Tenovos navigation bar, click Add Files. The Upload Assets page appears.

-
Drag and Drop the files to upload to Tenovos.
-
Select one or more Security Templates. This sets the permissions for the uploaded assets.
-
Select a Metadata Template. This tags the uploaded assets with the applicable attributes.
-
In Add to Collection, you can add the uploaded assets to an existing collection or create a new one.
-
To add the assets to an existing collection, click the Add to Collection field and select a collection from the dropdown list.
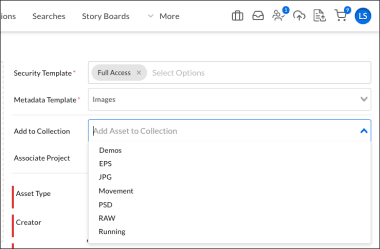
-
To create a new collection, type the new name in the Add to Collection field. If the collection does not already exist, Tenovos automatically identifies your entry as a New Collection.
A. After typing in the new name, click its entry in the Add to Collection dropdown list. The New Collection dialog opens.

B. Select a Collection Type of Private or Shared.
C. Select the Metadata Template "Secured Collection."
D. Re-enter the Collection Name.
F. Click Continue. The collection is created and is displayed in the Add to Collection field. Proceed to the following Step 6.

-
-
In the Upload Assets page, click Associate Project to select a related project for the assets. (Optional.)
-
Provide the information required by the metadata template that you selected in Step 4.
-
Click Upload Assets. Tenovos uploads the assets to the collection you specified.
Download assets from a collection
You can download assets from your Private collections and assets in Shared collections that you are permitted to download.
To download assets from a collection:
-
In the Collections page, open the collection. You can download a single asset, Download Selected or Download All:
- Download a single asset. Open the asset's context menu and click Download. The system Save dialog box is displayed. Save the asset to the required location.
- Download Selected. Select the assets to download. Click Download Selected. Tenovos begins processing your request.
- Download All. In the task bar, click Download All. Tenovos begins processing your request.
-
If you chose to Download Selected or Download All, open the Jobs page, and locate the request. When the Status is "Complete," you can Save the ZIP file to your system.
Remove assets from a collection
You can remove assets from your Private collections and the Shared collections that you are permitted to modify.
To remove assets from a collection:
- In the Collections page, open the collection and select the assets to remove.
- Open the Collections page task bar menu and choose Remove from Collections. (CAUTION: You will not receive a confirmation prompt.) The assets are removed from the collection.
Add a collection to the Cart
You can add a collection of assets to the Cart for future actions. When there are assets in the Cart, a number on the Cart icon displays the asset count.
To add a collection of assets to the cart:
-
In the Collections page, open the collection.
-
In the page task bar, click Select All to select all the collection assets.

- Click Add To Cart. The assets are added and the Cart icon displays its new asset count.
Delete a collection
You can delete your Private collections and the Shared collections that you are permitted to modify.
To delete one or more collections:
-
Display the Collections page.
-
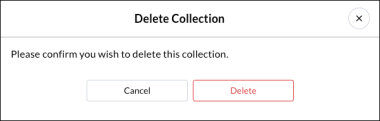
To delete a single collection, open its context menu and click Delete Collection.
To delete multiple collections, select them, then click Delete in the page task bar.
A collection's context menu:

- At the prompt, click Delete.
Share a link to collections and their assets
You can share links to collections and their assets with internal users—users with credentials to the system. For Shared collections, you can send a link to a specific collection or selected assets in that collection. For Private collections, you can send a link to assets you select in that collection.
Email a link to a collection
You can email internal users a link to a Shared collection.
For Private collections, you can only send a link to assets you select in that collection. For details, see Email a link to selected assets in a collection and Generate a link to assets in a collection.
To email a link to a Shared collection:
- On the Collections page, locate the collection to share. Then open its context menu and click Share.

- In the Share Collection dialog, search for and select the email addresses of the internal recipients. As you type, Tenovos presents a list of potential matches from which you can select. (You can select multiple user accounts.)
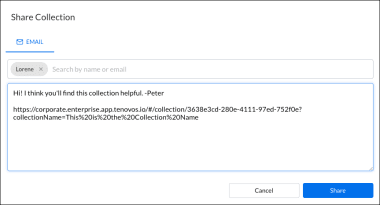
- (Optional.) In the text box, edit the default message.
TIP: You can copy the link in the text box and share it via other distribution channels such as your organization's messaging app.
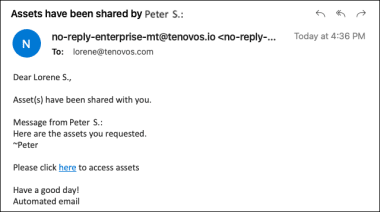
- Click Share to send the email. The recipients receive an email similar to the following.

Email a link to selected assets in a collection
You can send an email with a link to assets you select in a Private or Shared collection. You can only send the email to internal recipients.
To email a link to selected assets in a collection:
-
On the Collections page, locate and open the collection.
-
Select the assets to share, then click Share in the task bar. The Share Asset dialog opens.

-
Enter the email addresses of the internal recipients. As you type, Tenovos presents a list of potential matches from which you can select.
-
Click Share to send the email. The recipients receive an email similar to the following.
Generate a link to assets in a collection
You can generate and copy a link to assets you select in a Private collection or Shared collection. Only internal users can follow the link and view the assets.
To generate a link to assets in a collection:
-
On the Collections page, locate and open the collection.
-
Select the assets to share, then click Share in the task bar. The Share Asset dialog opens.

- Display the Internal Link tab, then click Copy Link. You can now share that link.